


 Senior Member

 |
Join Date: Jun 2008
Location: Midlands, UK
Posts: 720
|
Tilt and shift lenses
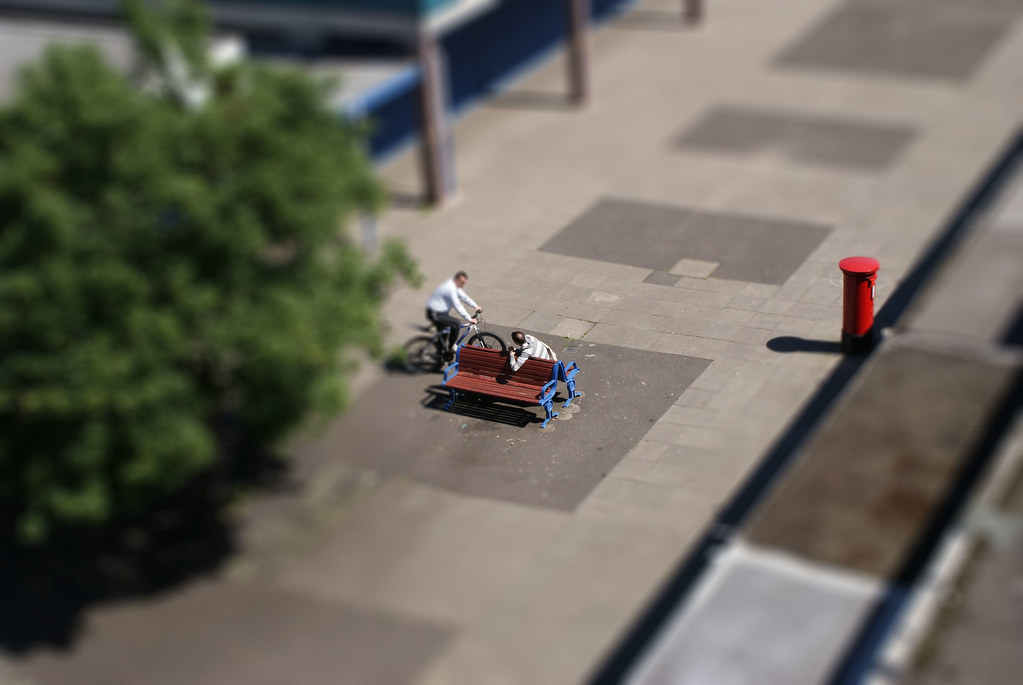
An experiment to see if it is possible to *fake* Tilt/shift lenses...
Comments?

Comments?
|
Kit 1 Sony A57 Sony 3.5-5.6 /18-55 Sony 4.5-5.6 75-300 Tamron 4-5.6 70-300 |
|
Senior Member
|
Join Date: Jun 2008
Location: Midlands, UK
Posts: 720
|
More tilt and shift
|
Kit 1 Sony A57 Sony 3.5-5.6 /18-55 Sony 4.5-5.6 75-300 Tamron 4-5.6 70-300 |
|
Senior Member
|
Join Date: Jun 2008
Location: Midlands, UK
Posts: 720
|
And the last...
|
Kit 1 Sony A57 Sony 3.5-5.6 /18-55 Sony 4.5-5.6 75-300 Tamron 4-5.6 70-300 |
 Admin Team
|
Join Date: Sep 2007
Location: South Wales, UK
Posts: 15,385

 |
Nicely done Gaz  I think the one that works best is #1
|
Kit 1 Nikon D300 Nikon 55-200mm VR |
Kit 2 Nikon D40 Nikon 18-55mm |
|
|
My Compact/P&S: Panasonic Lumix TZ7 |
|
Senior Member
 |
Join Date: Mar 2008
Location: uk/usa
Posts: 10,146
|
|
Senior Member
|
Join Date: Jul 2008
Location: Kolossi, Cyprus
Posts: 1,554
|
I think the third one works very well - nice technique - good work
 Senior Member
|
Join Date: Oct 2007
Location: Dundee, Scotland
Posts: 3,552
|
Like these very much, bit like the "toy town" posts we all had a go at a while back.
|
Kit 1 Nikon D40x Nikon 18-55mm Nikon 55-200mm |
|
|
My Compact/P&S: Sony DSC-W70 |
|
Senior Member
|
Join Date: Sep 2007
Location: east sussex
Posts: 3,484
|
Strange for me to say but I do like the effect, its different. As already said by Pepsi it the toy town effect that makes it. Maybe Gaz you would like to explain the process on how you did it as you have removed the Exif data.
Bazza
Bazza
|
Senior Member
|
Join Date: Jun 2008
Location: Midlands, UK
Posts: 720
|
Quote:
Originally Posted by Bazza

Strange for me to say but I do like the effect, its different. As already said by Pepsi it the toy town effect that makes it. Maybe Gaz you would like to explain the process on how you did it as you have removed the Exif data.
Bazza
Bazza
It isn't a difficult process, if you have Photoshop (I'm using CS3, but I'm sure it's the same throughout. I've not tried it in Elements, Serif Photo Plus, The Gimp or other photo-manip software yet, but the technique will be similar, just alter the recipe to suit
Here's a walk-through with pictures. I hope it isn't too condescending...I wrote it so someone like me stands a chance of understanding it
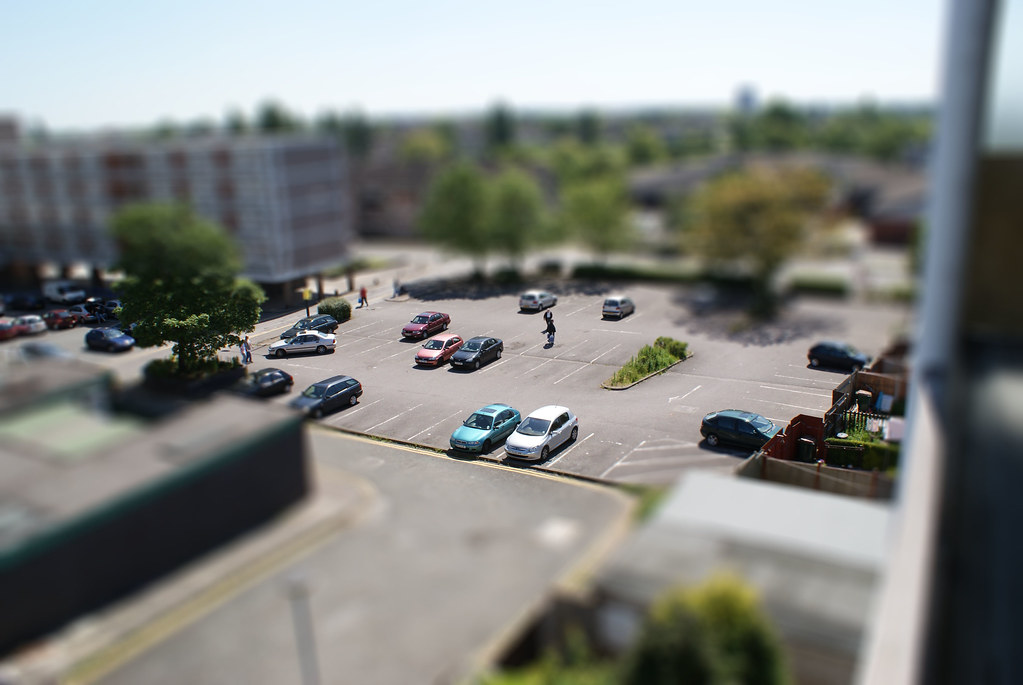
Firstly you need a suitable shot. Pictures taken looking down from a high vantage point work best, I think. I try to get everyday objects like cars in, to give a sense of scale, and if the ground can be quite heavily textured, like a poorly surfaced car park, all the better. Having people in shot actually improves the *scale model* effect.
Having selected the shot, work out where you want the focus to be. Try to get a good detail in the centre of the picture, because you want that to be in sharp focus.
This picture has none of those hallmarks, but it was one I had available..sorry

Select the eliptical marquee tool (the one that looks like a circle of parading ants,
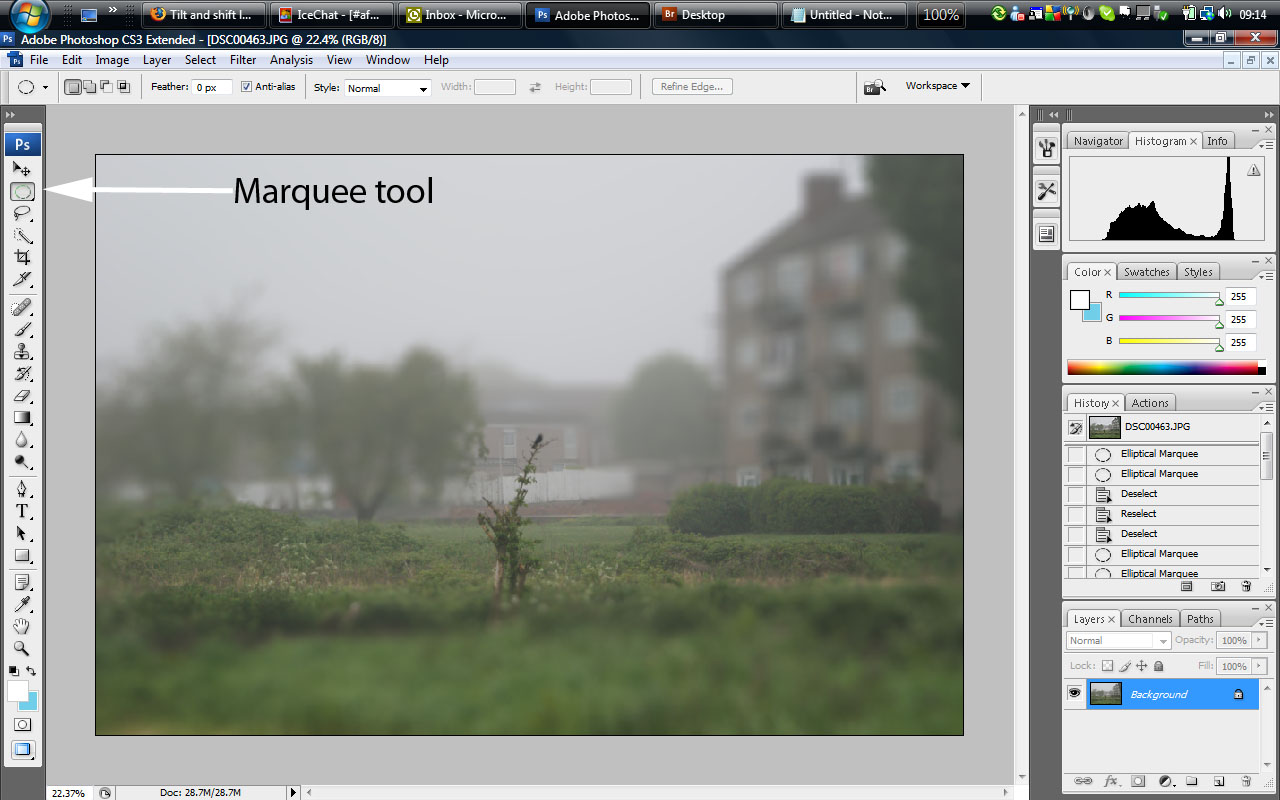
on the left hand side) and start to select the area you want to keep in focus. Holding down the *shift* key will allow you to keep selecting areas while not de-selecting that which you've already done. If you over-select, hold down the *alt* key, and you can deselect just the bit you overshot...I hope that makes sense...try it, it is actually easier than the explanation

If, like me, you are all thumbs, and keep forgetting to hold the shift key, you will immediately deselect everything you've selected. You can go to the *select* menu at the top of the screen and click *reselect* which gets back everything you just lost...
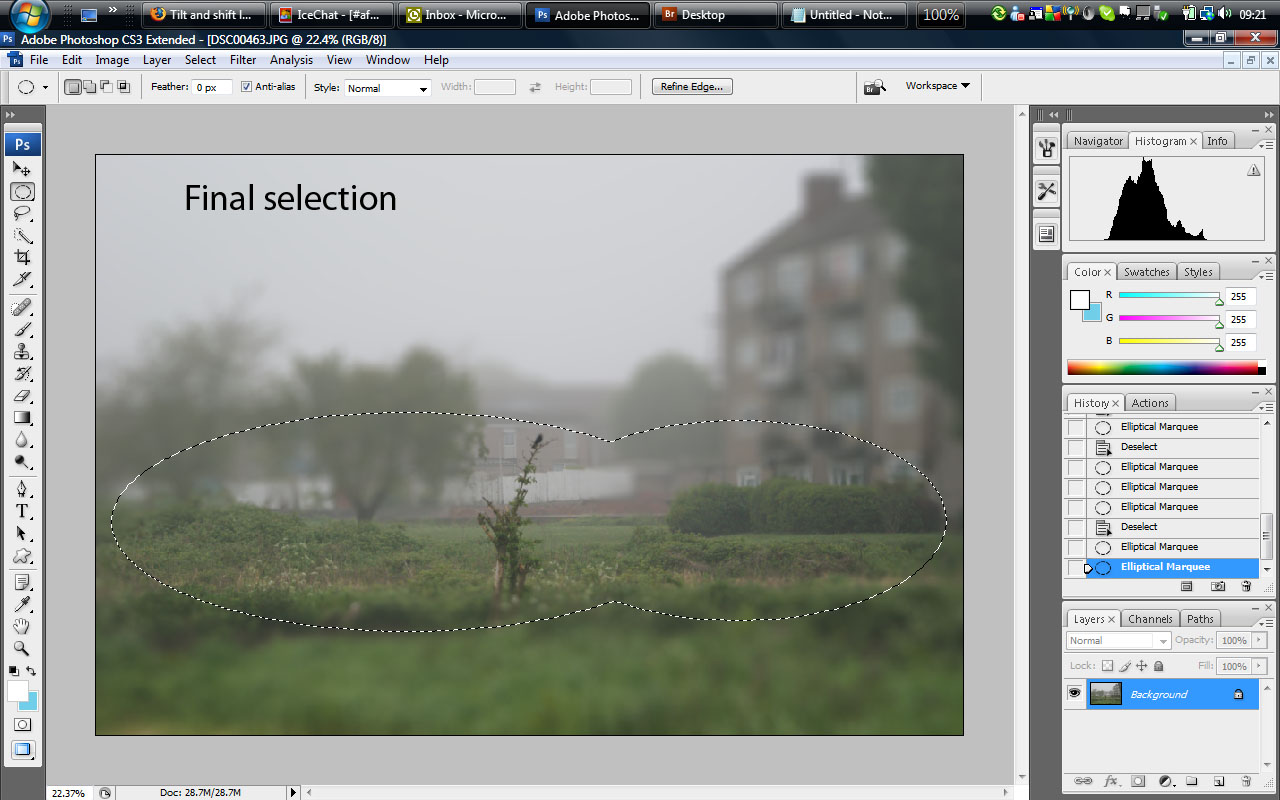
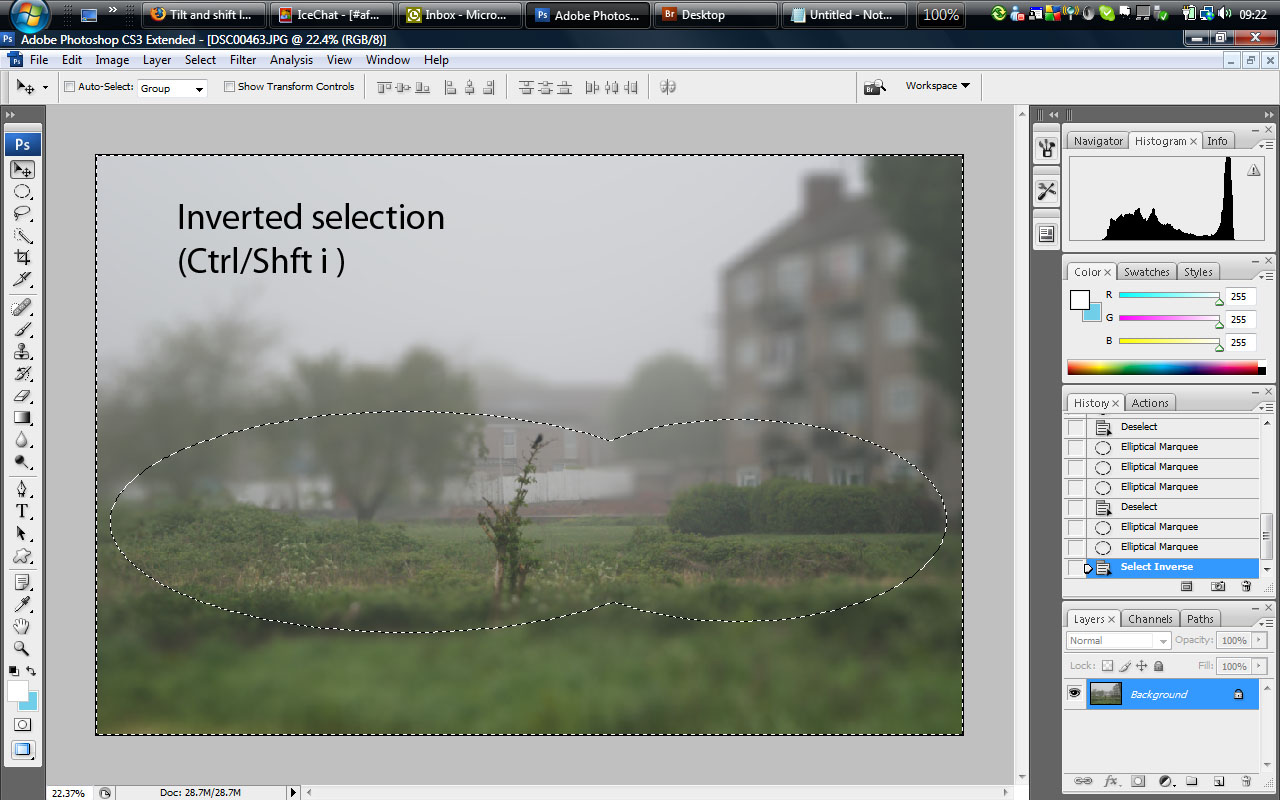
Once you are happy with your selection, you need to invert it...just hold down ctrl and shift, and press *i* on the keyboard. The marching ants will now be marching all round the picture and across your selection. That is pretty much the hard bit done...
Go to the *select* menu, and click *refine edge*
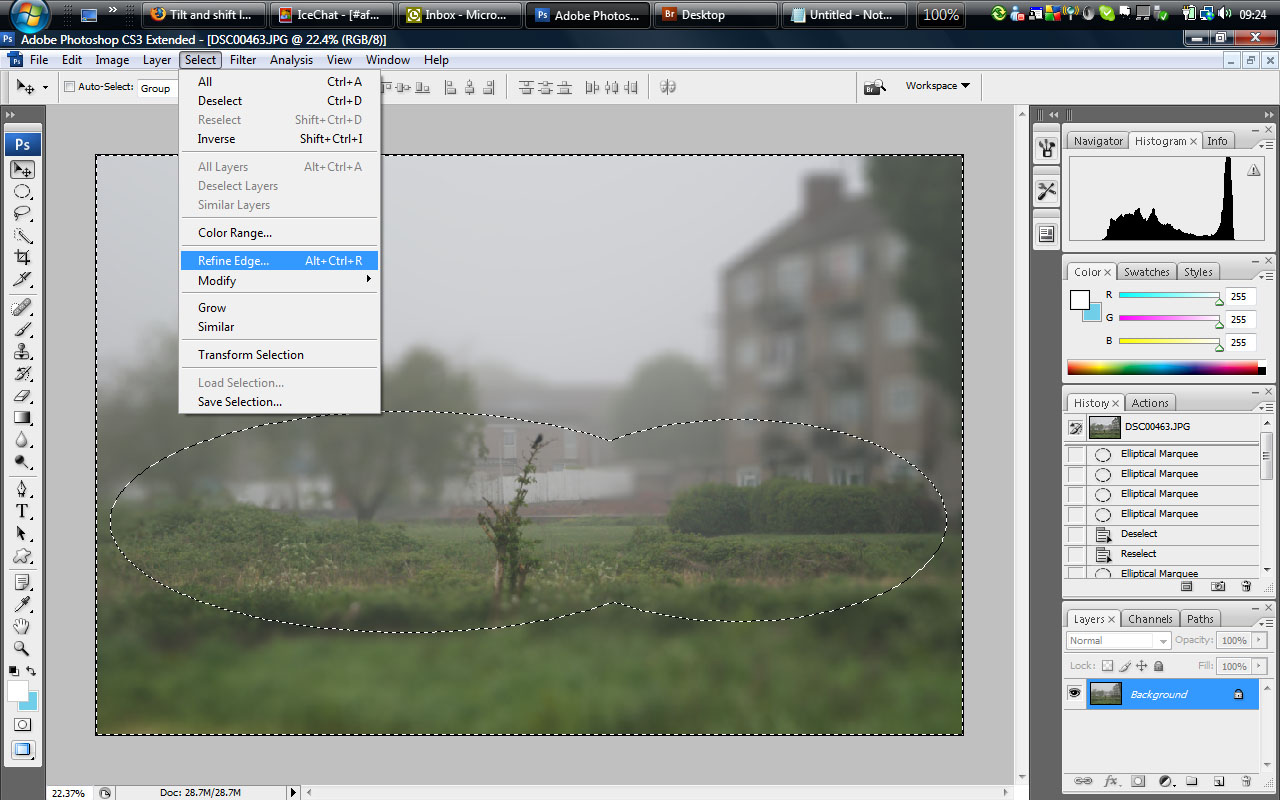
and a pop-up menu will appear. Here you get the chance to put your stamp of originality on the efect...I use radius 1, smooth 60 and feather 75. This blends the effect giving no really sharp edges, but experiment to see what works best for you.
If you look to the bottom of the menu box there are a series of Mobius loops in coloured frames. Click on the 4th (black on white) one to get an idea of where the fading and focus is going to lie. The expand/contract slider will allow you to adjust the size of the effect without having to redraw it...when you are satisfied click *OKAY* and let it do its stuff.

Finally (we're getting there, folks) select *Filter* on the top menu, then *Blur*, and *Lens blur* in the drop-down.
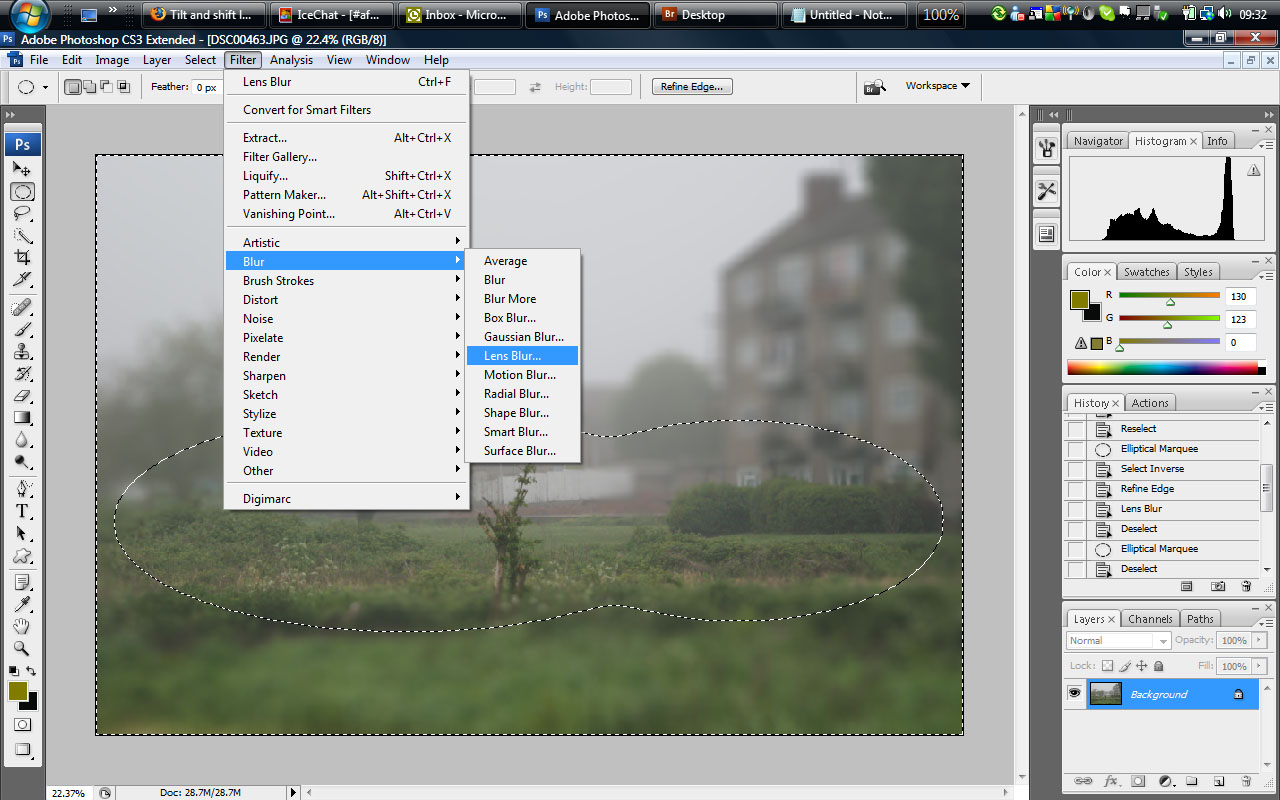
Another pop-up menu appears. More chance to be artistic, but I generally use *hexagon* in the shape section, 75 on the radius and 150 on the threshold. I leave everything else *as is*> Try these settings, then experiment. You will be given a preview of how it will look, but bear in mind, depending on your computer this is going to be really slow.

When you are happy, select *OKAY* again, and let it do its stuff. Et voila! Or any other ice-cream flavours...one *tilt/shift* fake.
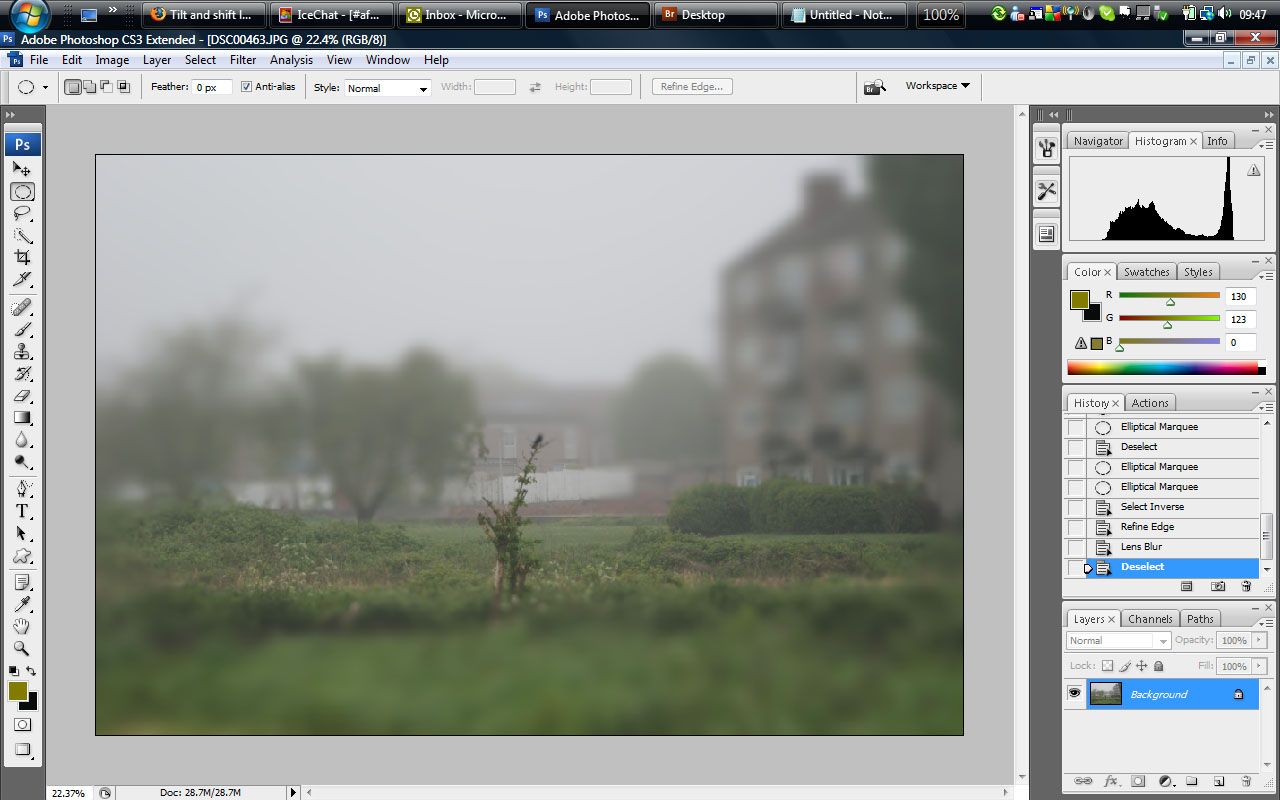
Don't forget to save the pic with a different title, Photoshop will happily over-write the image with the new one, and you've lost your starting image.
That's it. Have fun. Put some up here, please, if this has been useful? And Azz, if it is, could you copy this to *tips tricks and giuides* please?
|
Kit 1 Sony A57 Sony 3.5-5.6 /18-55 Sony 4.5-5.6 75-300 Tamron 4-5.6 70-300 |
|
Senior Member
|
Join Date: Sep 2007
Location: east sussex
Posts: 3,484
|
Oh dear Another Photo Shop edit, which I don't have. I use Nikon NX or Windows digital Editing Suite. But thanks for the explaination anyway.
Having seen people trying to show how to do things in Photoshop I wonder why they use it, its go here go there, do this and do that. In Windows Digital Imaging Suite there is no need for all that and so much simplier.
Bazza
Having seen people trying to show how to do things in Photoshop I wonder why they use it, its go here go there, do this and do that. In Windows Digital Imaging Suite there is no need for all that and so much simplier.
Bazza