

|
||||||


| Log-in/register to unlock all the member quick-links and features! |
 |
 Senior Member

 |
Join Date: Jun 2008
Location: Truro, Cornwall UK
Posts: 939

 |
Well done you  - looks great now and you must be very satisfied......whats the next roject then...
- looks great now and you must be very satisfied......whats the next roject then...|
Kit 1 Sony a700 Sigma 28-300mm f/3.5-6.3 |
|
|
My Compact/P&S: Sony DSC-W35 |
 Senior Member
 |
Join Date: Sep 2007
Location: Central Scotland
Posts: 855
|
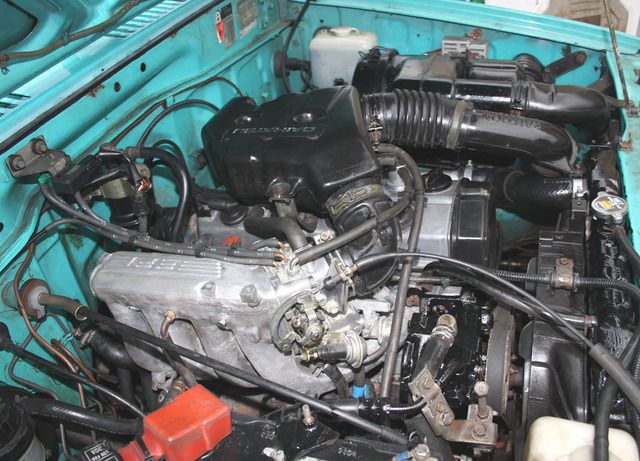
Here you go Snapper, pics of the engine, I had it on the road for 2 weeks but I noticed a slight miss-fire and loss of coolant.
I removed the cylinder head and the head gasket was rotten due to there being no anti freeze in it for 3 years.
It had blown on cylinder #2 you can see how clean the piston crown is due to the steam.
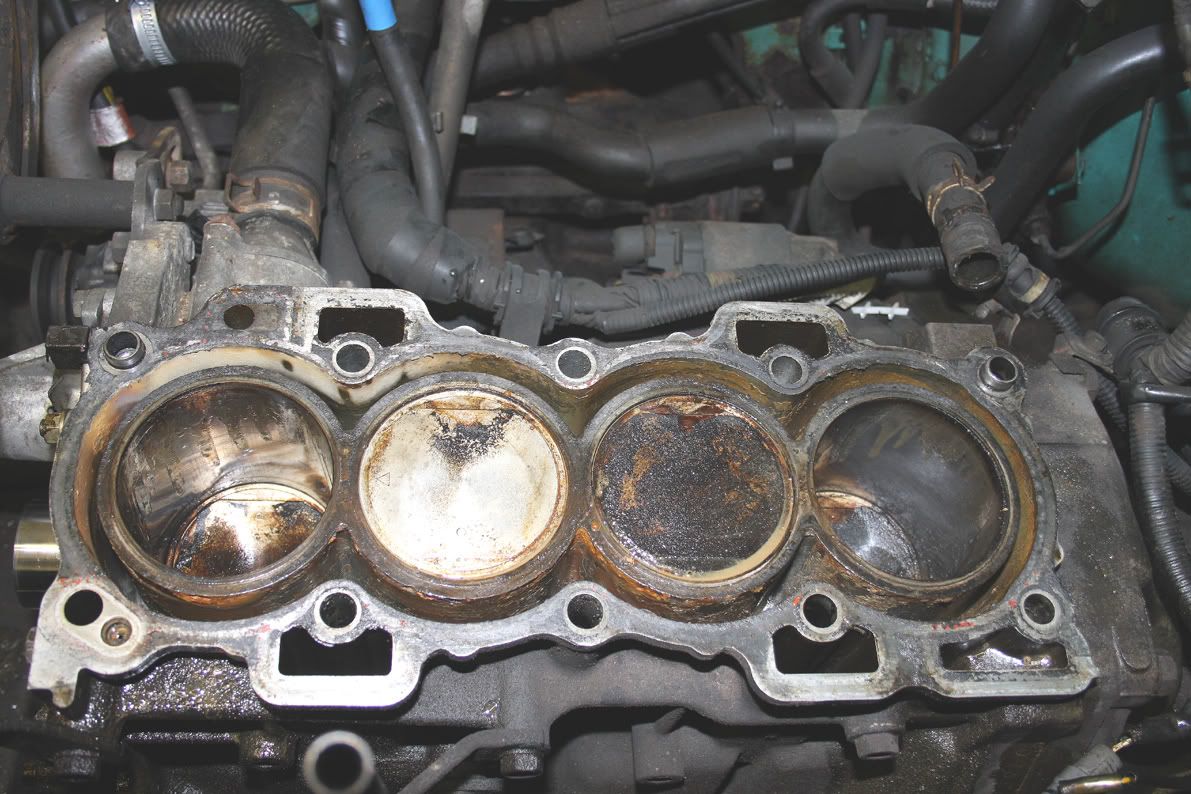
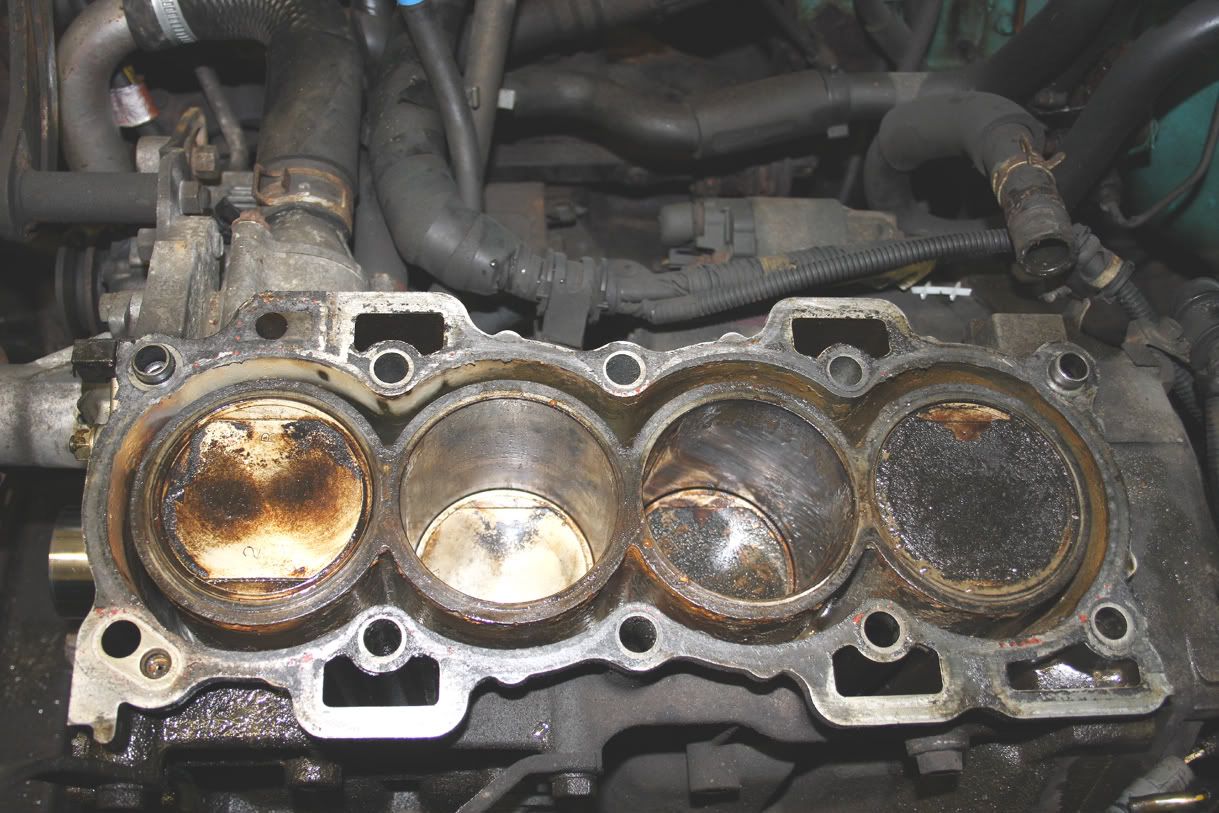
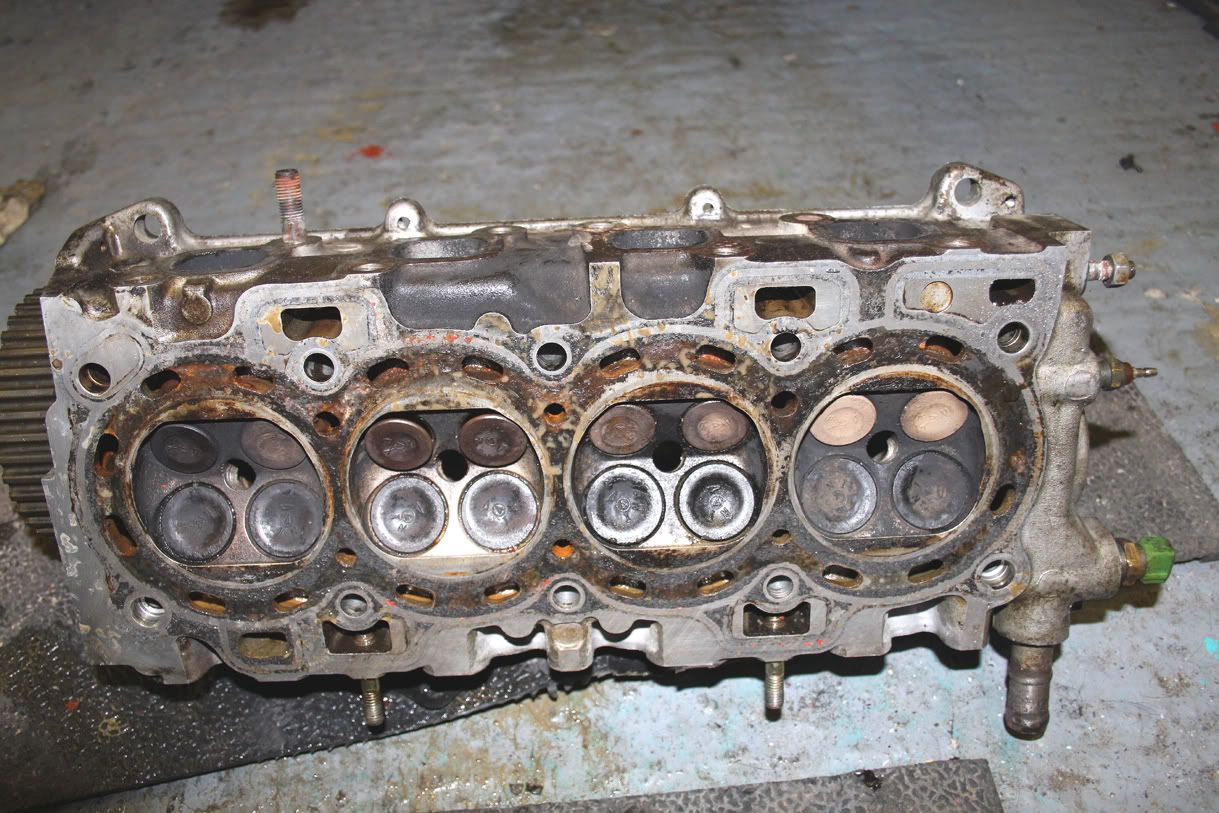
The valves were needing done too.
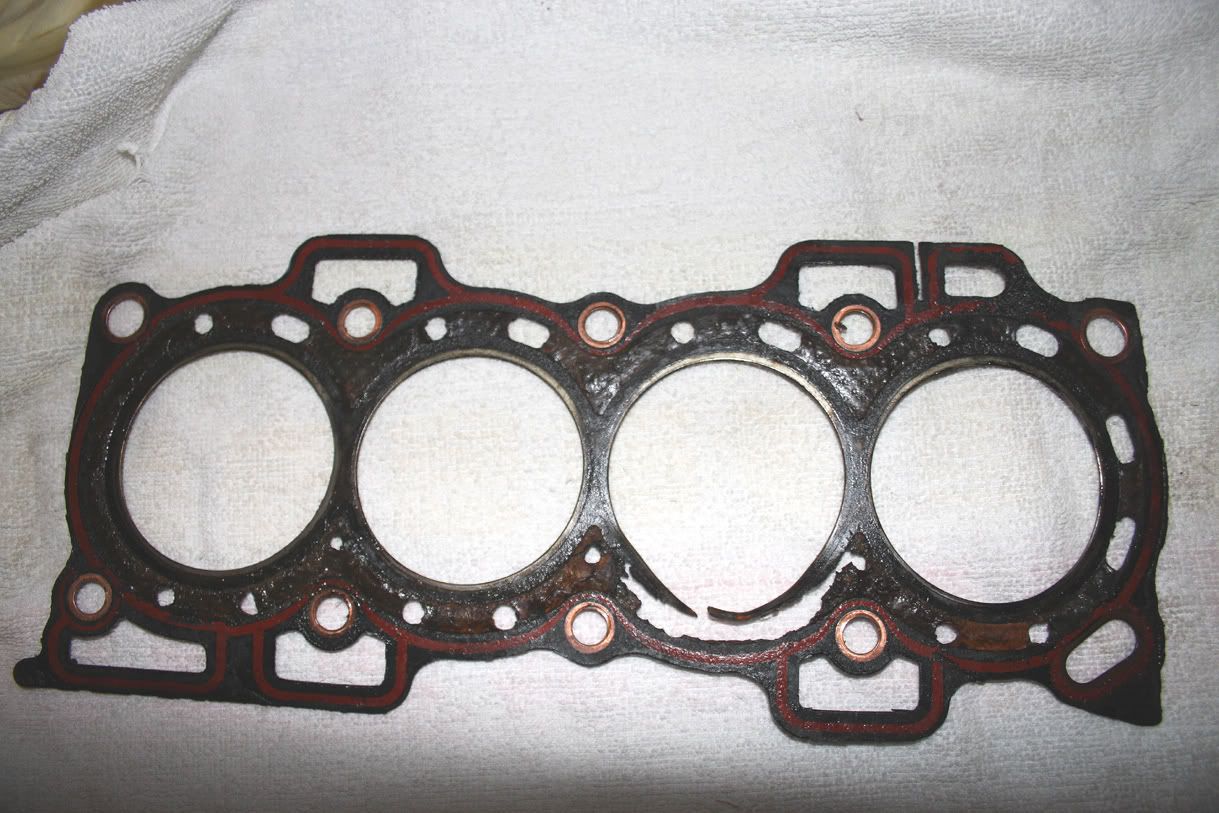
This is the old gasket, note how the composite material has disintegrated due to the corrosion.
All put back together again, it's an EFI and it's a nightmare to work on, you have to remove the cylinder head complete with inlet and exhaust manifolds attached, I had to use a block and tackle.
I removed the cylinder head and the head gasket was rotten due to there being no anti freeze in it for 3 years.
It had blown on cylinder #2 you can see how clean the piston crown is due to the steam.
The valves were needing done too.
This is the old gasket, note how the composite material has disintegrated due to the corrosion.
All put back together again, it's an EFI and it's a nightmare to work on, you have to remove the cylinder head complete with inlet and exhaust manifolds attached, I had to use a block and tackle.
|
Kit 1 Canon 350D Canon 18-55 f:3.5-5.6 Tamron 28-300 f:3.5-6.3 Sigma 28-200 f:3.5-5.6 Canon 28-80 f:3.5-5.6 canon 80-200 f:4.5-5.6 |
Kit 2 Canon 40D Sigma 10 - 20 f:4.5 |
Other Kit View my profile to see my other kit! |
|
My Compact/P&S: Sony Mavica |
|
Senior Member
|
Join Date: Sep 2007
Location: Central Scotland
Posts: 855
|
Quote:
Originally Posted by Bazza

Having restored a 4 door Morris Minor several years ago but not in such bad condition I can appreciate how much work has gone into your restoration. I found that as soon as you removed one rusty bit there is another behind it and rapidly it becomes almost a body off project.
Don't know if you did like me, scour the scrap yards for bits and pieces to save on cost and failing that purchasing from "copy" parts against main dealer parts which cost the earth.
To do it within the time you did is amazing I would have taken a lot longer. What you have done, at the time digital cameras wern't around when I did mine, was to photograph the restoration which is important should you come to sell the car.
All I can say is congratulations on the project the car looks fantastic.
Bazza
I phoned every scrap yard in Scotland looking for a petrol engined one and eventually found one in Methven near Perth, there were plenty of diesel ones about But I was lucky locating the one I found.
I spent 5 whole days up there stripping off every part that was available, the engine and transmission had been removed prior to me getting there but all the electrics, steering etc were still on it.
The wiper motor, the electric windows motors, the brake servo, all the steering linkages and ball joints off the wish-bones and king-pin brackets, the good thing about the ball joints is they all have grease nipples so all you have to do to prevent them failing is grease them once or twice a year.
I saved a fortune, I even got the complete hubs/discs and calliper assemblies off it, the hubs are very complex as they're automatic locking hubs, I recon the value of those alone would be around £1,000 each.
I also got both prop-shafts and they aint cheap to buy.
The petrol tank was a bargain too, the retail price for that was £280, I got it from the scrap yard for £40.
I have two large boxes of usable parts in the shed, I even stripped the seats out of the scrap one, on the last day I was up there I said to John the owner "well that's about it John, Thanks for saving me a fortune", he said "all you've left me with is the shell, the only thing you did'nt get was the engine and transmission".
|
Kit 1 Canon 350D Canon 18-55 f:3.5-5.6 Tamron 28-300 f:3.5-6.3 Sigma 28-200 f:3.5-5.6 Canon 28-80 f:3.5-5.6 canon 80-200 f:4.5-5.6 |
Kit 2 Canon 40D Sigma 10 - 20 f:4.5 |
Other Kit View my profile to see my other kit! |
|
My Compact/P&S: Sony Mavica |
|
Senior Member
|
Join Date: Sep 2007
Location: east sussex
Posts: 3,484
|
Seeing the pictures of the inside of the engine remind me when I used to replace piston rings- replace big ends with new shells -de coke and hand grind in the valves- etc. Still got the piston ring (and valve) compressor, clutch alignment tool and other bits and pieces somewhere in the garage. There was one problem I had with my Austin Mini van and that was misfiring under pressure , but ok when idling.
New distributer and rotor arm didn't cure it, it was the carbon in the high tension leads had burnt back in one of the leads (something to watch out for). It had me foxed for ages until I realised that the piece of copper protruding from the end of the lead was only pushed into the carbon fibre conductor and not throughout the whole lead.
If it is an aliminium head beware of distortion, best to really have its surface ground before replacement, also don't use exisiting bolts as the "stretch". Its recommended to use new ones each time the head is removed. No such problem with a cast iron head distortion isn't an issue.
The head actually looks good with no signs that I can see of imminant crackes with water mark tracking between cylinders and water ways.
You could use hermatite to help seal the new gasket from any distortion that may have occured.
Having stripped the engine that far it wouldn't be much more to remove the sump to get to the main bearings from underneath, watch out for the markings as the shells fit on one way as do the bearing clamps, and replace the white shells and remove the pistons and replace the piston rings
Bazza
 Senior Member
|
Join Date: Oct 2009
Location: london
Posts: 266
|
great job well done
|
Kit 1 cannon EOS-350D AF 70-300mm,1:4-5.6ld-tele-macro 1:2-tamron cannon-efs 18-55-ultrasonic+automatic extension kit -3 rings |